This Ten Minute Tip is the first in a series looking at how we can geolocate images as part of OSINT work. Being able to examine a picture and work out when and where it was taken is an increasingly important skill to have. You could be a journalist trying to document human rights abuses, or helping law enforcement trace victims of child abuse. Whatever your reason for wanting to improve your geolocation skills, there’s a lot to learn and in this series we’ll start by looking at some easier methods before increasing the difficulty as we go along.
EXIF Data
Using EXIF data is the fastest and easiest way to geolocate an image. Phones and some digital cameras capture a whole range of metadata every time an image is taken. For OSINT purposes the most important piece of metadata is the GPS co-ordinates that record where the image is taken. We can extract this metadata from an image and then use the GPS coordinates embedded in the image to find out where it was taken.
It sounds simple enough – but there’s a big problem with this method. Although it is fast and very accurate, almost every social media site, web service, or messaging app removes GPS information from any images that they process. This is great from a privacy viewpoint, but it means that finding an image on the web that still contains useful EXIF data is very rare. If you can it’s always best to work with an original image if possible. Nevertheless there are still plenty of images with EXIF out there, and knowing how to use this data is an important tool to have in your OSINT kitbag.
Extract, Research, Verify
In this series you’ll hear me use the term extract, research, verify a lot. No matter the complexity of a geolocation task, these three steps are essentially the same for each image that we’re going to attempt to geolocate. Here’s what each stage involves:
Extract – gather as many information points from the image as possible. Sometimes this can be hard, but we’ll look at ways to do this in later videos in this series.
Research – we examine the data points we extracted and then research them to see if they are able to give us further information about the location. This could be something like a car registration plate or an unusual architectural feature..
Verify – we need to check our research findings to see if they are correct. Once we have an idea where an image might have been taken, we can use mapping tools or existing images to compare and check to see if we’re right.
This is a simple example just using EXIF data, so the only information we’re going to extract from an image are the GPS coordinates. Let’s look at how to do that.
EXIF Tools
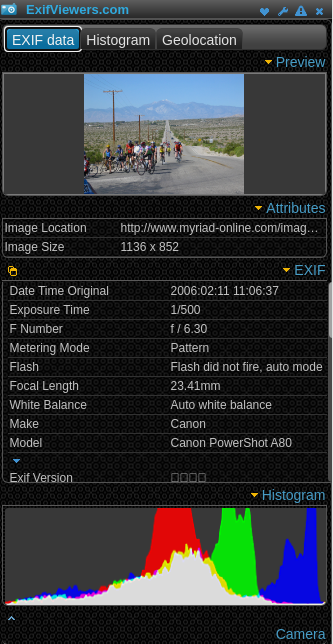
There are a variety of browser based tools that make extracting EXIF data simple. For Firefox there’s Exif Viewer, and for Chrome there’s Exif Viewer Pro. If you prefer to use a website-based tool to do this then I recommend Jeffrey’s EXIF viewer or the excellent Forensically. Both of these sites allow you to upload an image and view the EXIF data in your browser. For working offline there’s also the powerful Exiftool command line program.
In this video I used Chrome to install and run EXIF Viewer Pro. To install it, simply visit the Chrome Store, click on “Add To Chrome”.
Once installed, refresh your browser (F5) and you’ll be able to right-click on any image and view any EXIF data that’s present.
Extract & Research
In the example image there’s some EXIF data present. You can view the originally uploaded image here to try it yourself. For this simple example we’re really only going to extract and research a single piece of information (GPS coordinates) so the extraction and research phases are very short.
Once we’ve navigated to the image, right clicking on it and selecting EXIF Tool will bring up the information that we need.
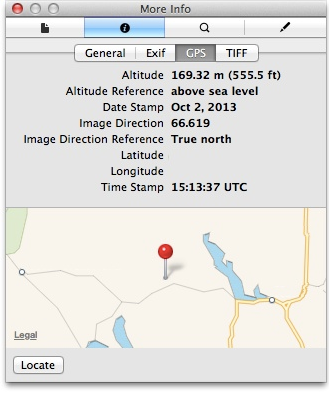
EXIF Tool opens up a small window to display the information contained in the image:
It’s useful to have the date and time of the original photograph, but to get the GPS data, all we have to do is click on the ‘Geolocation’ tab.
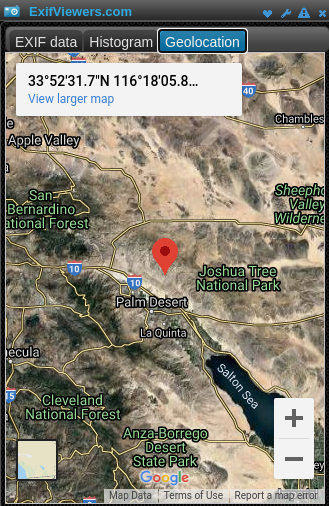
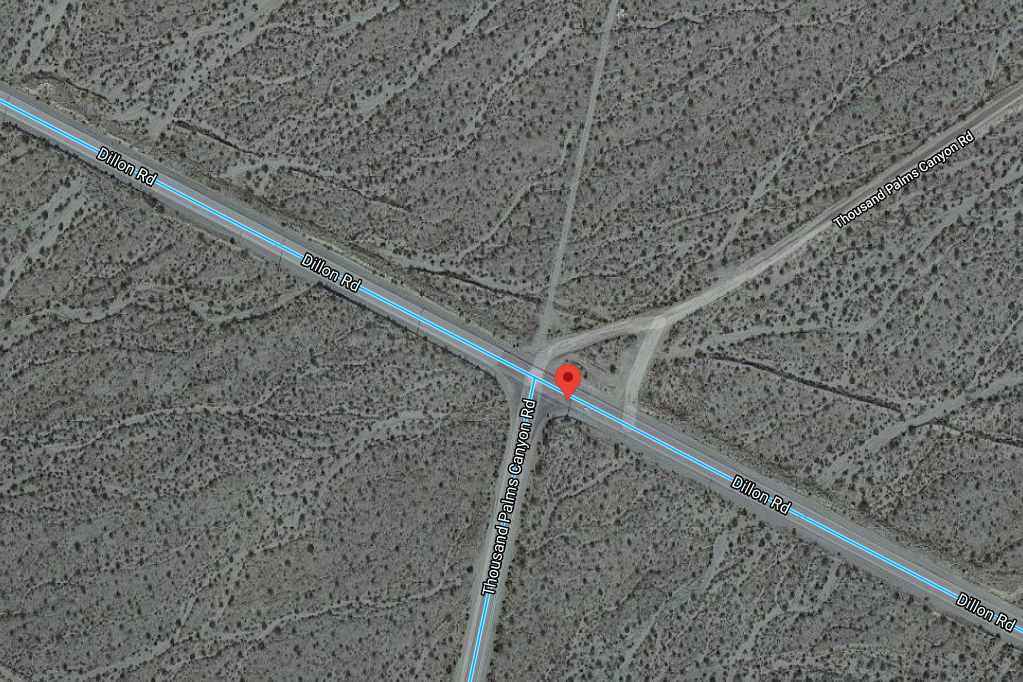
We’re presented with the GPS coordinates from the image overlaid on Google Maps. Job done? Not yet. We still need to verify that the location is correct.
Verifying The Location
EXIF data can be edited and GPS coordinates can be spoofed, and good OSINT practice means checking and substantiating that your findings are accurate. It’s always better to check rather than just assume.
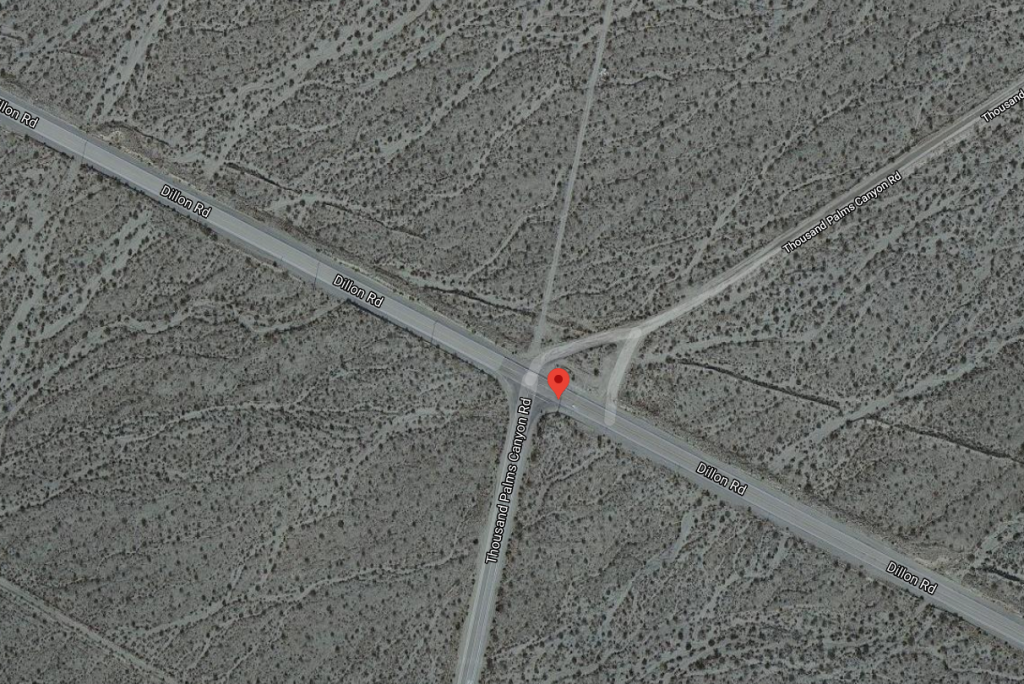
To verify this is the correct location, we can open up Google Maps at the specified coordinates. To do this either click on “View Larger Map” or copy and paste the coordinates into the Google Maps search bar.
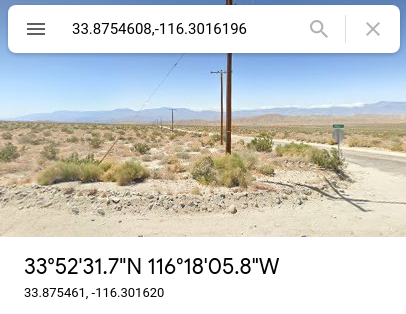
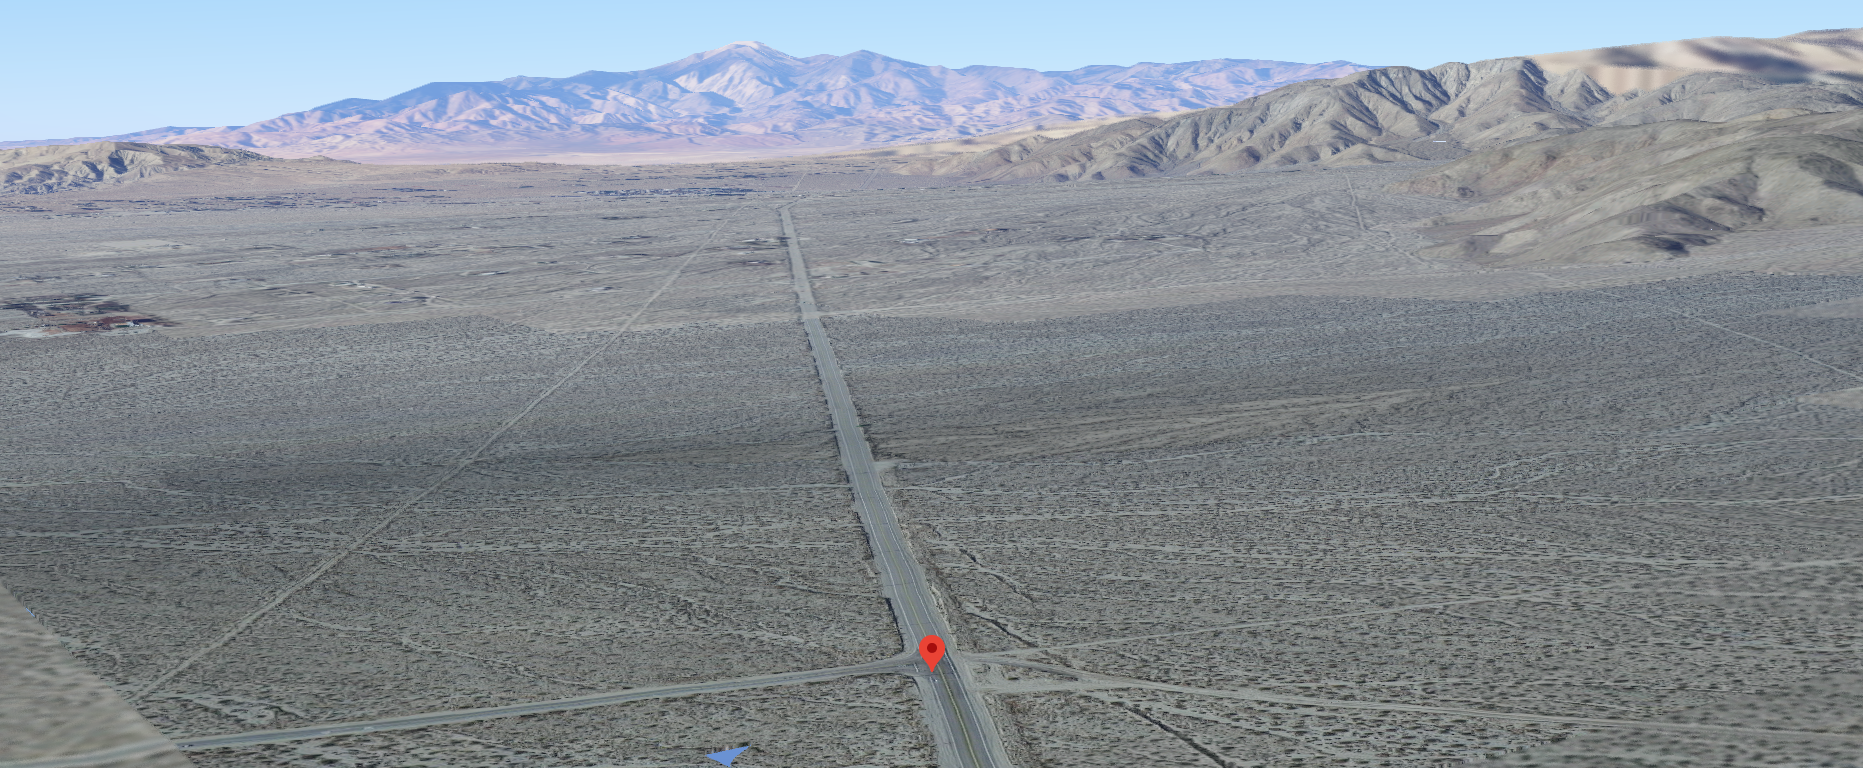
Our aim when verifying the location is to see if we can identify features in the original image that match what we find on Google Maps. If the features match, we can be confident we have geolocated the image correctly. The image looks promising but we need more detail.
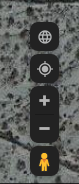
To get a closer look we can use Google Street View. To enable Street View click on the small stickman figure in the bottom corner:
You’ll see that areas with Street View coverage are highlighted in blue. To see the imagery, click on the part of the road you want to view, or drag the stickman figure to the location.
So now we need to compare the original photograph with what we’ve found in Street View. Let’s take a look:
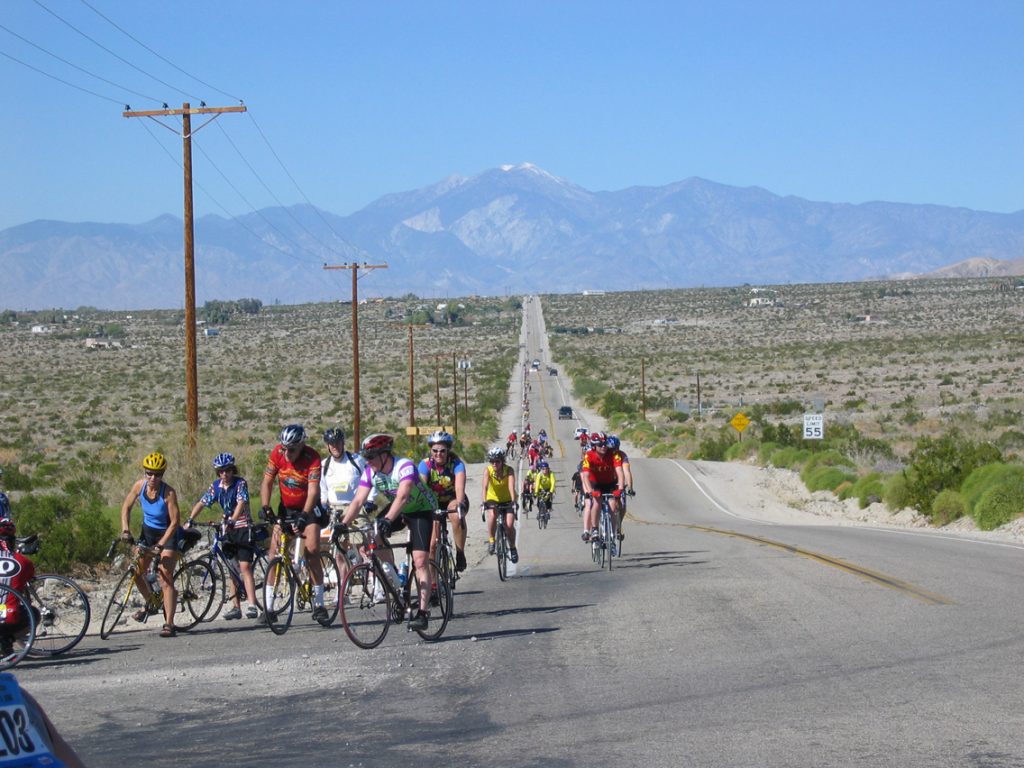
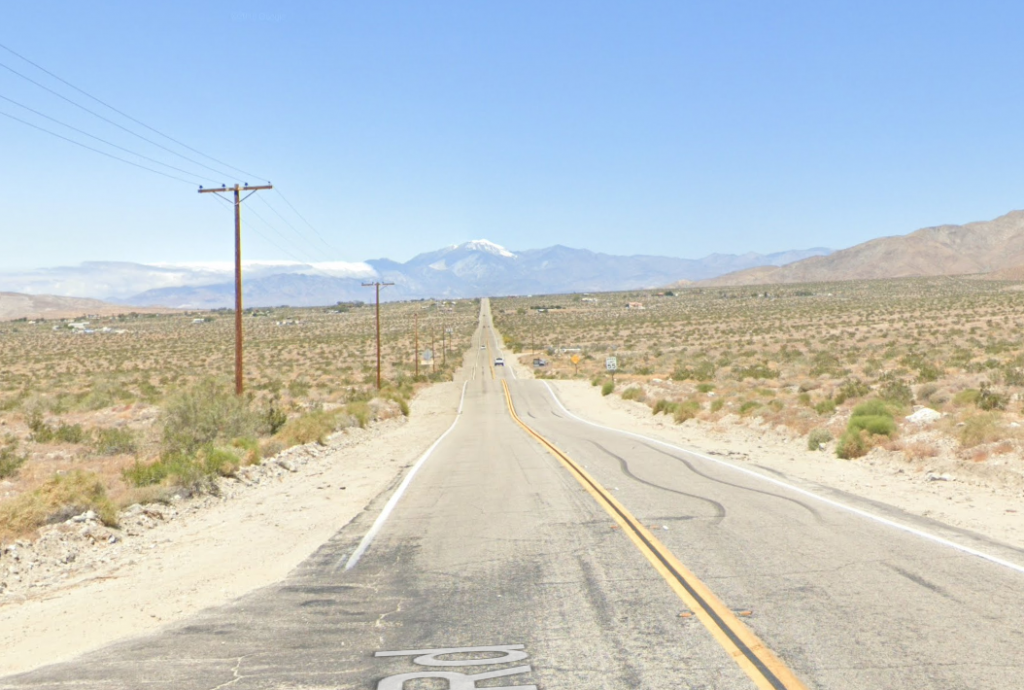
The distant mountains look the same. The telegraph poles on the left and road signs on the right all match up perfectly, even the road turning off to the left is just right. We can match all the original features with what we found on Street View so we can be confident that the EXIF/GPS data is correct and we know exactly where this image was taken.
Next Steps
Not all image geolocation is so easy of course and it’s quite rare to get access to EXIF data in web images. Despite this we’ll see that by applying the same extract, research, verify methodology it’s still possible to geolocate images without useful metadata to help. In the next Ten Minute Tip we’ll step up the difficulty slightly and see how to extract geographically useful information from images and use it to find locations.